Recovering Data from a 2015 Mac SSD with a $5 Adapter from AliExpress
I worked on a fun little project recently to recover data from my wife’s 2015 MacBook Air. Although that might not sound terribly interesting, the way I ended up using an adapter is one of the most ridiculous things I’ve ever done with a computer. So of course, I had to write a blog post about it.
Several weeks ago, my wife’s 2015 MacBook Air stopped working. It wouldn’t turn on, even when connected to power, and the screen was just blank. I don’t know exactly what went wrong with it, but probably the motherboard or some other internal component failed.
Since the computer was nearly ten years old, it was well past time to replace it with a new one anyway. But my wife was a little worried about data that wasn’t backed up. She does back up her computer occasionally, but hadn’t done so for a while and didn’t know exactly what data she might have lost. (There’s probably a lesson about backups there…) She didn’t think she’d lost any critical data, but wanted me to try to recover the data for peace of mind if it was easy and cheap. Fortunately for her, all the evidence suggested that her disk was fine! (If the disk had gone bad, I’d expect the computer to boot the BIOS and display an error message, not fail to turn on completely.) I decided I’d try to recover the data from the SSD!
Normally, recovering data from a functional disk is pretty easy. Just put the disk in a working computer, or attach it to a working computer with a USB adapter, and copy whatever you need. Not much harder than copying data off a USB stick. For this 2015 MacBook Air, however, it turned out to be much more difficult (and harder than I originally anticipated)! Almost all computer hard drives have standardized connector – SATA for most older 2.5” disks, and M.2 for newer SSDs.
Unfortunately, a 2015 MacBook Air uses neither SATA nor M.2. It uses a proprietary Apple “12+16” pin connector. This is incredibly annoying – it not only inhibits the upgradability of these machines, but also makes it much harder to recover data from them! The obvious approach to recover data from a 12+16 drive would be to install it in a working Apple computer with that kind of connector. But my wife’s MacBook was dead and I didn’t want to buy another ten year old laptop just for this data recovery.
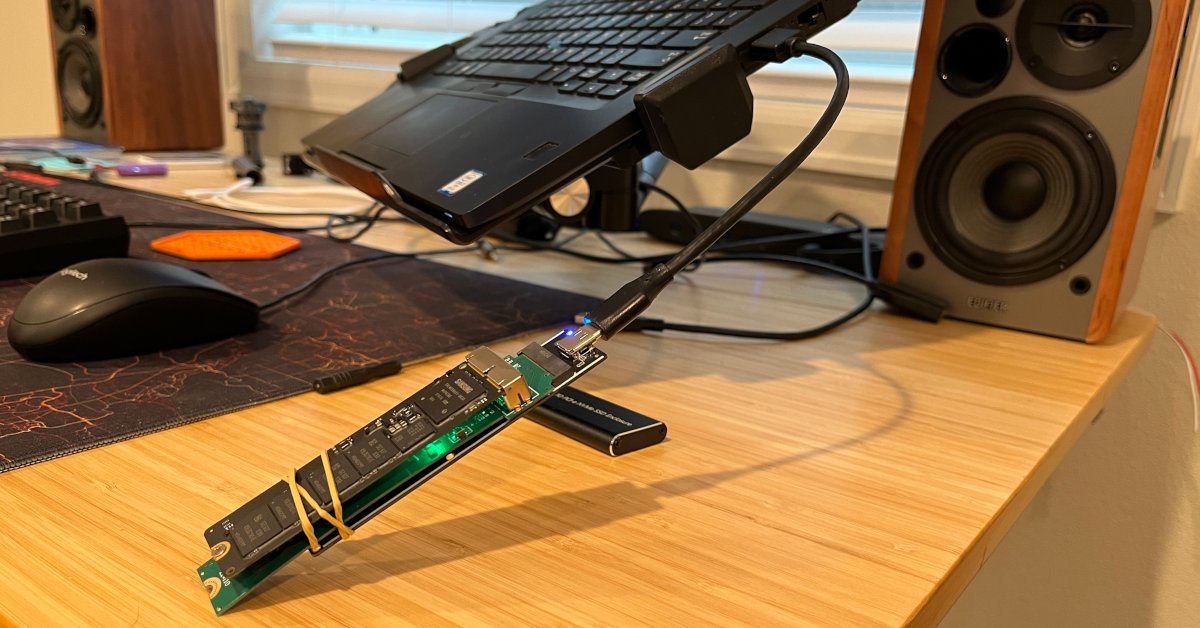
The other obvious option for data recovery is to find an adapter, and that’s what I did. I wanted to find 12+16 to USB-A adapter to plug the old Apple drive in like a USB disk, but I couldn’t find any adapters cheaper than a full disk enclosure for $60+. I was, however, able to find a 12+16 pin (female) to M.2 (male) adapter for just $4.11 (as of Dec, 2024) on AliExpress. I knew it was a bit of a gamble, but I decided to give it a go! I still wanted to plug this in like a USB disk to grab the data off it, so I also ordered a cheap M.2 USB enclosure for $6.88 from AliExpress. That led to the first ridiculous attempt to recover data from this drive, with 2 adapters between the Apple SSD and my laptop, and with rubber bands holding everything together.

The adapters did light up, and even showed up under lsusb in Linux, but
something in the chain wasn’t working right and the disk reported a size of
zero. Can’t say I’m terribly surprised.
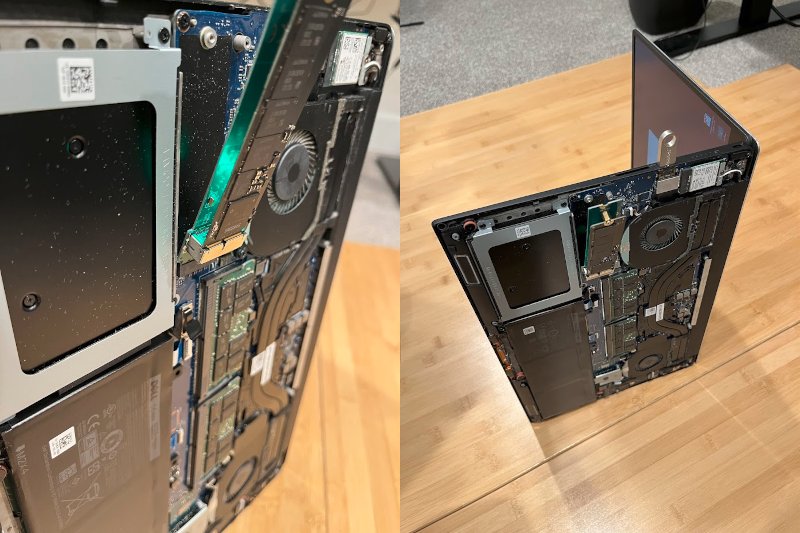
I knew it was a gamble ordering sub-$10 adapters from AliExpress (and even more of a gamble chaining two of them together), and I was ready to give up on the project when it occurred to me that I could still try taking one of the adapters out of the chain by plugging the Apple adapter directly into a laptop’s M.2 slot. My old Precision 5510 (which has become my Windows machine) had an empty M.2 slot that looked like it would work so I decided to give it a go! As it turns out, the 12+16 to M.2 adapter from AliExpress was slightly too wide and also too long to fit properly in my laptop. Would it read the drive (just long enough to copy the data off it) if it wasn’t seated properly? I booted the Windows laptop from a Live Ubuntu USB stick so I could work in Linux.

It WORKED!!!

I was a little surprised, and something in me felt an odd happiness at
succeeding with this ridiculous setup. I used dd to make an image of the Apple
disk:
sudo dd if=/dev/sdb of=~/Desktop/backup.img bs=4M status=progress
Since I was using Linux to run this backup, I didn’t even try to read the files. I just dumped the whole disk to a .img file. I transferred that file to my NAS, and from there to my wife’s new M1 MacBook.
hdiutil attach ~/Desktop/backup.img
The disk image mounted just fine on the new Mac, and we were able to recover all the files off the old drive. We copied the ones we cared about to the NAS, and then discarded the huge disk image file. So, if you ever find yourself needing to recover data from an old Apple 12+16 pin SSD, you might be able to do it for under $5 with an adapter from China! (But of course, do so at your own risk – especially when using a $5 adapter from China.)
About the Author

👋 Hi, I'm Mike! I'm a husband, I'm a father, and I'm a staff software engineer at Strava. I use Ubuntu Linux daily at work and at home. And I enjoy writing about Linux, open source, programming, 3D printing, tech, and other random topics. I'd love to have you follow me on X or LinkedIn to show your support and see when I write new content!
I run this blog in my spare time. There's no need to pay to access any of the content on this site, but if you find my content useful and would like to show your support, buying me a coffee is a small gesture to let me know what you like and encourage me to write more great content!
You can also support me by visiting LinuxLaptopPrices.com, a website I run as a side project.
Related Posts
- How Much Faster Does a New SSD Make a 2012 MacBook Pro? 01 Mar 2018
- Buying Used Computers: A Story and Some Advice 04 Feb 2024
- My $500 Developer Laptop 09 Sep 2023